Optotronics Laser Certification:
Specifications tested:
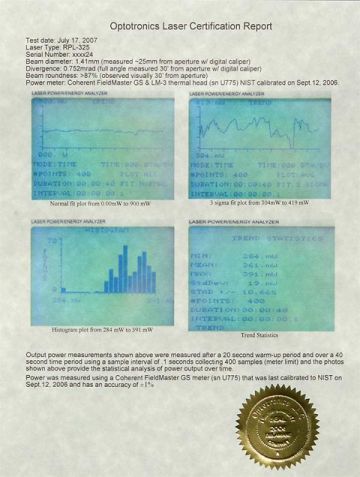
• Output power vs. time with statistics and plots.
• Average, Minimum & maximum output power.
• Standard deviation of samples measured.
• Output power stability (peak to peak, not RMS).
• Beam divergence (full angle)
• Beam diameter
• Beam roundness

Actual customer laser certification report (serial number edited to protect privacy).
Test Equipment and measurement technique:

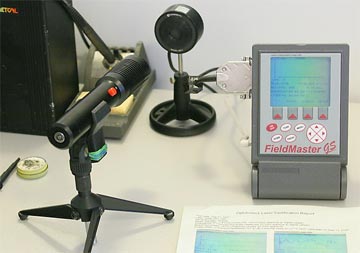
Photo of test setup at Optotronics for laser power measurements.
We use a Coherent Fieldmaster-GS power meter coupled to a Coherent LM-3 HTD thermal power sensor that is calibrated to NIST standards annually for our power testing. For our full laser certification, we sample the
output power over a period of 60 seconds beginning 30 seconds after laser power up, so as to not include any initial output power spikes and to allow the laser to warm-up.
Samples taken at 0.1 second intervals (600 samples) over the 60 second power output trend.
The resulting output plots, statistics and histograms are included in the full certification report.
Beam diameter is measured using one of our NIST calibrated calipers (either analog or digital model) at a distance of ~25mm from the laser aperture.
Divergence is then measured using these same calipers with the following technique.
The beam is terminated on a flat black non-reflective panel placed at a distance of 30 feet from the laser aperture.
The diameter of the projected spot is then viewed with laser glasses to cut down the brightness of the beam spot and increase accuracy of the measurement. The caliper is then adjusted so that 95% of the photons (visually estimated) are within the caliper adjusted diameter. This is done to remove any small amount of scattered light due to particulate matter in the air.
|


